I picked up an Attack From Mars in 2010 that came directly off route. It was pretty dirty but surprisingly it was very close to 100% working. The playfield and backbox general illumination (GI) were out, and one switch was missing its wireform actuator. I found the actuator in the cabinet, stuck it back on the switch, and everything played fine. So now it is time to tackle the GI problem.
")
The connectors at J105 and J106 have burned up as is typical. I replaced the connectors and re-pinned the board. You can also see that the diodes have gotten pretty hot. I ended up installing jumpers on the back side of the board to take the diodes out of the circuit. So the GI now runs on AC instead of DC.
On to the restore. It was pretty dirty.
")
")
The playfield was sent to HSA Pinball for restoration. Brian Weissmann, owner of HSA Pinball, performed a Level 2 restoration. Below is the upper playfield after it was stripped and given a basic cleaning to prepare it for shipping to HSA.
")
While the playfield was out for Brian to perform his magic, I went to work on the rest of the machine. The cabinet was in very good shape with minimal fading and a few dings. I did some minor touch up work, but all the artwork is original.
")
I repainted worn areas around the raised portion of the coin door frame, and I repainted the worn areas of the raised coin insert portion and the coin return door frames. The rest of the door and frame cleaned up nicely and did not need to be repainted. I matched the original finish and it all blends in nicely. (Edit: I ended up installing a new coin door. I still have the original.)
")
For the inside of the cabinet, I vacuumed and then sanded the cabinet base with an orbital sander. I then block sanded to get into the corners, especially at the front where there was a lot of overspray. All the wiring was cleaned.
The lockdown bar was cleaned, polished, clearcoated, and had new decals installed.
")
")
The inside sides of the cabinet were scuffed as is usual from the playfield being lifted, but they also had some cracking in the veneer that was present from the factory. I filled the cracks with Plastic Wood and then sanded it flush. I then masked and painted it with Rustoleum gloss black. You can see the cracks in the plywood’s veneer in the photo below. They just painted over them at the factory.
")
")
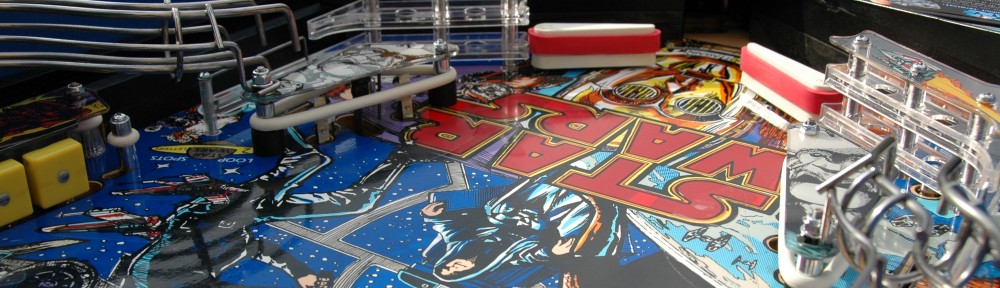
The plastics were in very good shape and most pieces only needed some cleaning. I did polish them where necessary to bring them back to life.
")
All other above playfield parts were cleaned and polished. I use a vibratory tumbler for all metal parts, and hand polish anything else that needs it. I also re-grained the metal ball guides and ramp protectors. Yes, they will be track marked very soon after the game is played, but I figure it is worth it go have a nice clean start. The ramps were flame polished.
All the under playfield machinery was disassembled, cleaned, and rebuilt. Anything that comes in contact with a pinball, either under or above the playfield gets thoroughly cleaned. There is no reason to clean a machine and leave dirt in parts where it will get spread around again after all your hard work. The playfield wiring was thoroughly cleaned. I also made new labels for the flipper coils as the existing ones were dirty and ripped.
For the lighting, I put incandescents back in the inserts. LED’s just don’t do justice to AFM’s attract mode sweeps and light show. I do have LEDs in the backbox and in the playfield GI because it cuts down on the heat and current draw significantly. For the playfield GI I used Comet warm white retro bulbs to keep the look more original.
Here are a few photos of the end result.
")
")
")
")
")
")
")
And finally, watch out for dirty Martians.
")