Note: There’s usually no reason to go to the extent I did to rebuild this power supply. The only reason I replaced so many parts on it is due to its condition. If your power supply is in good shape except for some specific issue such as low 5v, bad fuse clips, etc., just fix what is wrong. Don’t replace tons of stuff like in this article.
Power supply rebuilds are pretty easy. A pinball power supply is rather simple and there are a few common components that fail. So fixing what you have usually makes more sense than buying a new replacement power supply.
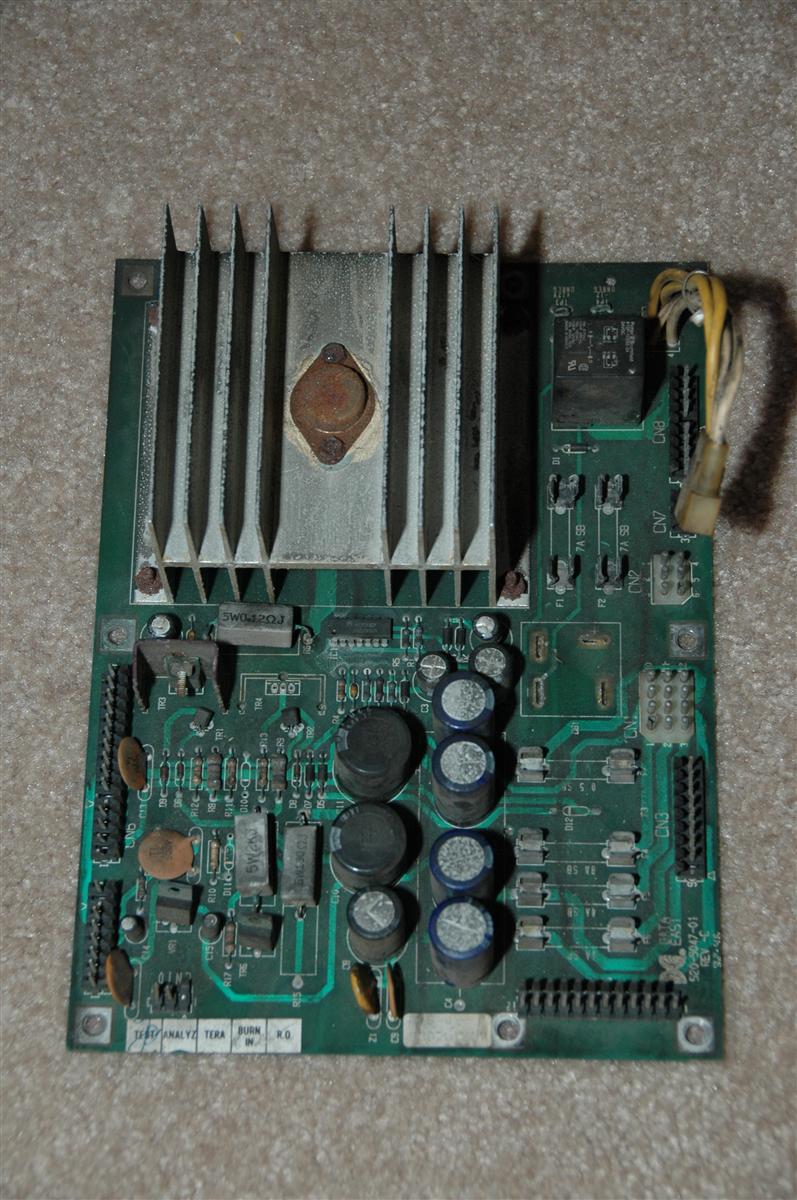
Of course, sometimes you don’t have a power supply to fix. This was my situation. I debated buying a new power supply. But then this showed up on eBay:
Yikes! It was listed for $20. I decided to take a chance and made an offer of $10. The seller accepted and I ended up getting it for a little under $19 after shipping.
This is a 520-5047-01 Rev. C power supply. It is used in games with the 128×32 dot matrix display, i.e. games from Lethal Weapon 3 through Guns N’ Roses.
In addition to being subjected to some parts scavenging, it looks like the board had been in a fire. I’m not sure if something in the game caught on fire, or if the game was near a fire. Upon inspection, the PCB itself and components were not subjected to excessive heat. The plastic on the GI relay showed no signs of heat damage, nor did anything else look toasty. All we’re looking at here is smoke damage. So it is time for a rebuild.
On a power supply out of a previously working game, you don’t need to go to the measures I did. Due to the condition of this board I replaced everything except for a few resistors, diodes, and the GI relay. The diodes at D10 and D11 were missing, but I would have replaced them anyway as they are prone to failure. Always replace C2. It gets baked from the heatsink and while you have the board out, put in a new one for reliability.
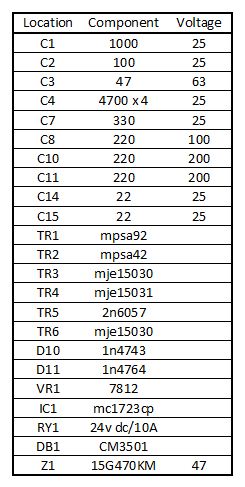
Here is a list of the common parts on a Data East power supply.
I order everything I can from Great Plains Electronics. If you are replacing the 2N6057 at TR5, use a 2N6059 for extra reliability. And make sure to pick up a TO-3 heatsink gasket for the 2N6059, or a TO-3 mica spacer if you are using thermal compound. By the way, Z1 is a varistor. And it is a good idea to replace the CM3501 bridge rectifier with a beefier CM3504.
Also be ready to replace the fuse clips. Pay attention to the orientation of the clips when installing them. The tabs on the clip go on the outside. It stinks to have to remove them and turn them around.
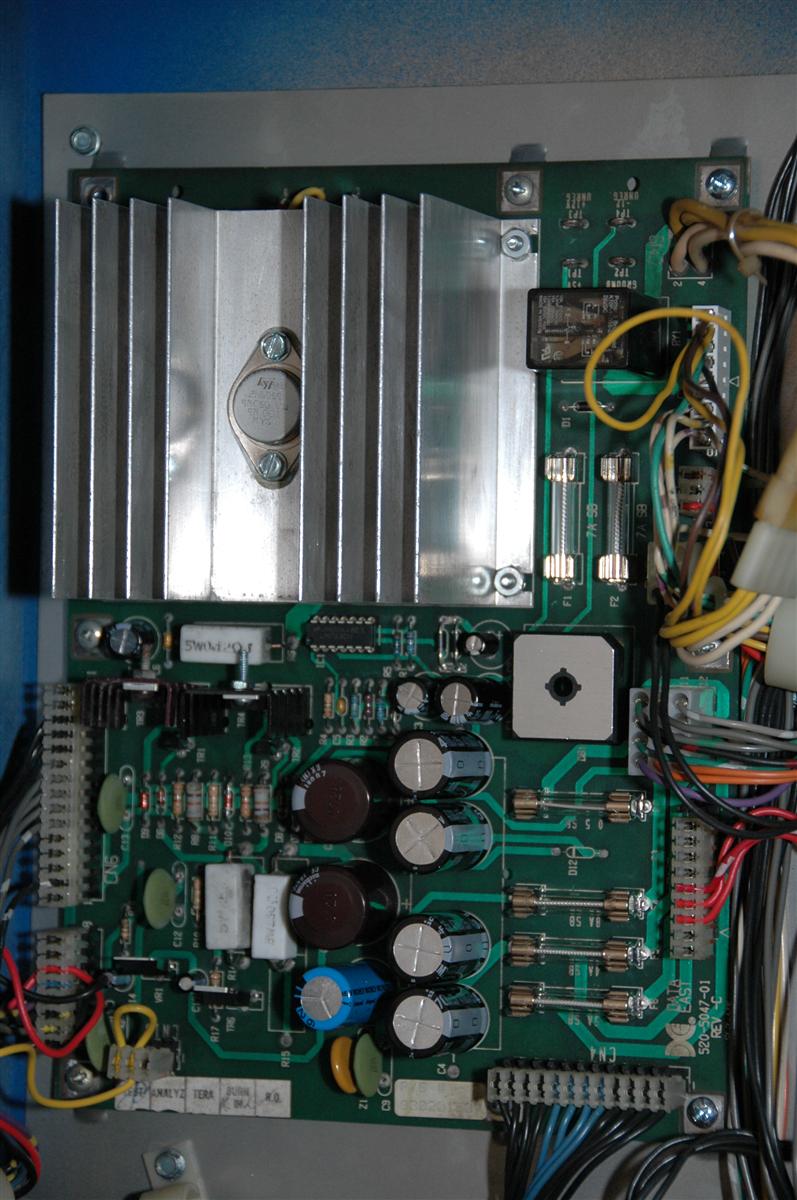
Here it is all done and cleaned up. It works fine, all voltages measure right on the money, and it is still working great as of today.


